注: ローカル Linux リポジトリ (repo) の設定は、サポート対象外です。以下の手順の設定は、参考のために掲載しています。
ステップ 1: Nginx Web サーバーのインストール
1. まず最初に、EPEL リポジトリから Nginx HTTP サーバを以下のように YUM パッケージマネージャでインストールします。またリポジトリの同期に必要な wget コマンドもインストールします。
yum install -y epel-release nginx wget
|
2. Nginx ウェブサーバをインストールしたら最初に起動し、システム起動時に自動的に起動するようにします。
systemctl start nginx
systemctl enable nginx
systemctl status nginx
|
3. 次に Nginx サービスへの Web トラフィックを許可するためにポート 80 を開く必要があります。以下のコマンドを使用して HTTP のインバウンドパケットを許可するようにシステムのファイアウォールルールを更新してください。
firewall-cmd --zone=public --permanent --add-service=http
firewall-cmd --reload
|
4. 以下の URL を使って Nginx サーバーが稼働していることを確認できます。デフォルトの Nginx ウェブページが表示されることを確認してください。
注: この例では linux.example.com を使用していますが、ご利用のリポジトリサーバーの IP またはドメイン名に置き換えてください。
http://SERVER_DOMAIN_NAME_OR_IP
|
ステップ 2: ローカルリポジトリの作成
5. パッケージと関連情報 (パッケージメタデータ) を格納するために必要なディレクトリを作成します。
mkdir -p /var/www/html/repos
|
6. リポジトリから最新のパッケージのローカルミラーを作成します。
注: 初回実行時は時間がかかる場合があります。次回以降はファイルが新しい場合のみ更新されるため、時間がかからなくなります。
|
レポジトリのブランチは以下のような名前です:
/sep_linux/14.3RU1/
/sep_linux/14.3RU2/
/sep_linux/14.3RU3/

RU4: /SAL/1.0/
RU5: /SAL/1.1/
RU6: /SAL/1.2/
RU8: /SAL/1.3/
RU9: /SAL/1.4/
|
wget -q -P /var/www/html/repos -x -N -nH -i https://linux-repo.us.securitycloud.symantec.com/sep_linux/14.3RU3/latest.txt   # FOR RU3
wget -q -P /var/www/html/repos -x -N -nH -i https://linux-repo.us.securitycloud.symantec.com/SAL/1.0/latest.txt   # FOR RU4
wget -q -P /var/www/html/repos -x -N -nH -i https://linux-repo.us.securitycloud.symantec.com/SAL/1.1/latest.txt   # FOR RU5
wget -q -P /var/www/html/repos -x -N -nH -i https://linux-repo.us.securitycloud.symantec.com/SAL/1.2/latest.txt   # FOR RU6
wget -q -P /var/www/html/repos -x -N -nH -i https://linux-repo.us.securitycloud.symantec.com/SAL/1.3/latest.txt   # FOR RU8
wget -q -P /var/www/html/repos -x -N -nH -i https://linux-repo.us.securitycloud.symantec.com/SAL/1.4/latest.txt   # FOR RU9
|
|
最新のレポジトリ複製の注意点
Wget コマンドラインパラメータ:
-q      Quiet
-P dir  Download to the directory prefix
-x      Keep directory structure
-N      Only download if newer
-nH     No host directories
-i      Input file
|
重要: Ubuntu や Debian に Symantec Endpoint Security をインストールするためのローカルリポジトリを作成する場合、次のコマンドを実行してメタデータを利用できるようにする必要があります。
find /var/www/html/repos/sep_linux/* -type d -name sep_linux |xargs -i{} ln -sf "{}" "{}_cdm"
|
7. Web ブラウザでリポジトリとその中のパッケージを閲覧できるようにするには、下記のようにリポジトリのルートを指す Nginx サーバーブロックを作成します。
vim /etc/nginx/nginx.conf
|
サーバーセクションを探し server_name、root、location (必要な場合) を以下のように更新してください。
/etc/nginx/nginx.conf

server {
   listen 80 default_server;
   listen [::]:80 default_server;
   server_name linux.example.com; # change to your real domain
   root /var/www/html/repos; # change to match top level directory of repo

   # Load configuration files for the default server block.
   include /etc/nginx/default.d/*.conf;

   location / {
   index index.php index.html index.htm;
   autoindex on; #enable listing of directory index
   }

...

}
|
8. SELinux が有効で Enforcing モードの場合、リポジトリからのファイル提供を許可します。
getenforce  # If Enforcing, continue
chcon -Rt httpd_sys_content_t /var/www/html/repos   # Allow Repo files to be hosted by nginx
|
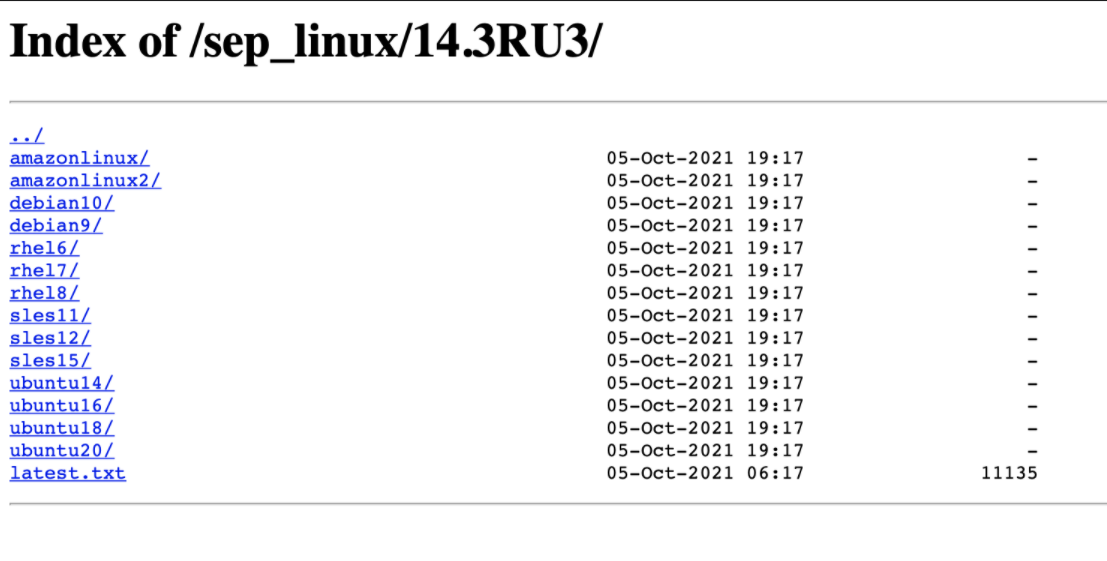
9. Nginxサーバーを再起動し、Web ブラウザから以下の URL でリポジトリを表示します。
systemctl restart nginx
http://linux.example.com/sep_linux/14.3RU3
|
ステップ 3: ローカルリポジトリを同期させるための cron ジョブを作成する
10. 次にローカルリポジトリと公式リポジトリを自動的に同期して、アップデートやセキュリティパッチを取得する cron ジョブを追加します。
vim /etc/cron.daily/update-localrepos
|
スクリプトにこれらのコマンドを追加します。
/etc/cron.daily/update-localrepos

#!/bin/bash
# Pull the latest Repo files for SEP Linux 14.3
# Uncomment desired release repos

# wget -q -P /var/www/html/repos -x -N -nH -i https://linux-repo.us.securitycloud.symantec.com/sep_linux/14.3RU1/latest.txt  # for RU1
# wget -q -P /var/www/html/repos -x -N -nH -i https://linux-repo.us.securitycloud.symantec.com/sep_linux/14.3RU2/latest.txt  # for RU2
wget -q -P /var/www/html/repos -x -N -nH -i https://linux-repo.us.securitycloud.symantec.com/sep_linux/14.3RU3/latest.txt    # for RU3
wget -q -P /var/www/html/repos -x -N -nH -i https://linux-repo.us.securitycloud.symantec.com/SAL/1.0/latest.txt              # for RU4
wget -q -P /var/www/html/repos -x -N -nH -i https://linux-repo.us.securitycloud.symantec.com/SAL/1.1/latest.txt              # for RU5
wget -q -P /var/www/html/repos -x -N -nH -i https://linux-repo.us.securitycloud.symantec.com/SAL/1.2/latest.txt              # for RU6
wget -q -P /var/www/html/repos -x -N -nH -i https://linux-repo.us.securitycloud.symantec.com/SAL/1.3/latest.txt              # for RU8
wget -q -P /var/www/html/repos -x -N -nH -i https://linux-repo.us.securitycloud.symantec.com/SAL/1.4/latest.txt              # for RU9
|
スクリプトを保存して閉じ、適切なパーミッションを設定します。
chmod 755 /etc/cron.daily/update-localrepos
|
ステップ 4: ローカルリポジトリを使用してインストールする
11. ネットワーク上のサポートされる Linux クライアントマシンで、ローカルリポジトリを使用してインストールします。
linux.example.com はリポジトリサーバーのドメイン名または IP に置き換えてください。
注: 14.3 RU3 以降の最新の LinuxInstaller を使用してください。
# ./LinuxInstaller -- --local-repo http://linux.example.com/sep_linux/14.3RU3


Configuring Local Repo (http://linux.example.com/sep_linux/14.3RU3) for
Symantec Agent for Linux
Symantec Endpoint Protection (Cloud) ..

Symantec Agent for Linux
Symantec Endpoint Protection (Cloud) 14.3.202.3000

Installing scripts package:
Package Version Source
---------------------------------------- --------------- ------
sdcss-scripts                            2.2.5-77        (repo)

Installing packages:
Package Version Source
---------------------------------------- --------------- ------
sdcss-caf                                2.0.3-118       (repo)
sdcss                                    6.9.2-202       (repo)
sdcss-kmod                               10.0.2-1102     (repo)

Agent installed successfully
Starting Agent..

Symantec Agent for Linux
Symantec Endpoint Protection (Cloud) 14.3.202.3000

Daemon status:
cafagent running
sisamdagent running
sisidsagent running
sisipsagent running

Module status:
sisevt loaded
sisap loaded

Communication status:
..........
server connection success
|
