Creating an Automation Policy to move resources into an Organizational Group
Article ID: 181792
Updated On:
Products
IT Management Suite
Client Management Suite
Issue/Introduction
How can I automate the population of an Organizational Group using SMP (Symantec Management Platform)?
Environment
ITMS 8.x
Resolution
Below is an example of how to set up an automation policy to dynamically add resources to an Organizational Group
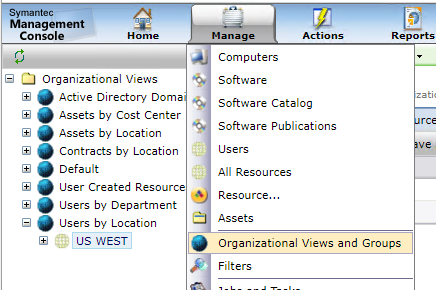
1. In the SMP Console click on Manage and then choose Organizational Views and Groups
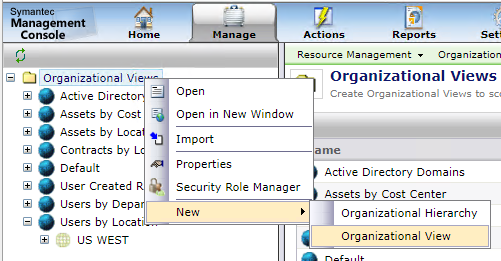
2. Right Click on the folder Organizational Views
3. Choose New -> Organizational View
4. In the right-hand pane click on New Organizational View and rename the Organizational View to Subnet (we will use Subnets as an example but you can use the same for Locations, buildings, regions, etc).
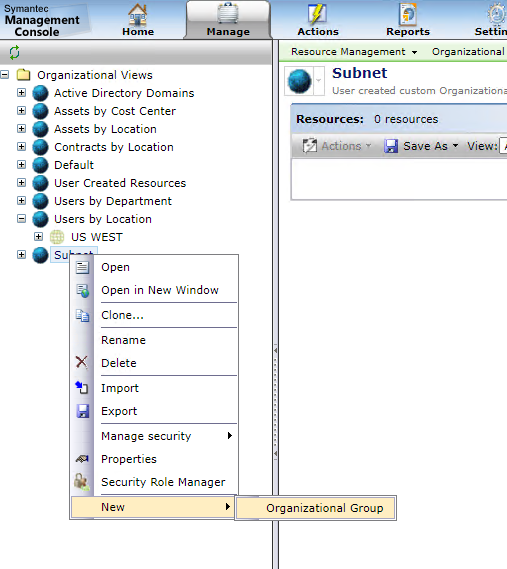
5. Right click on the Subnet Organizational View in the left-hand pane
6. Choose New -> Organizational Group
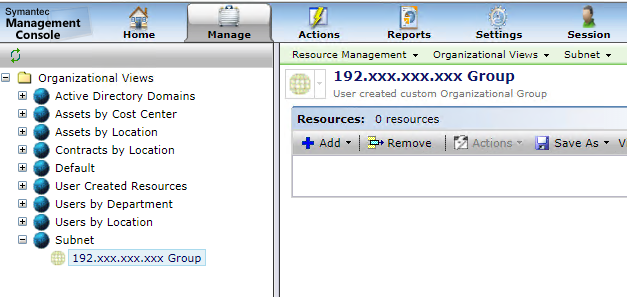
7. In the right-hand pane click on New Organizational Group and rename the Organizational Group to 192.xxx.xxx.xxx Group.
Note: if you were to create a new Organizational View for Users in a certain building, create a new one and called it for example "Users to building" and add an Organizational Group with the name of the building.
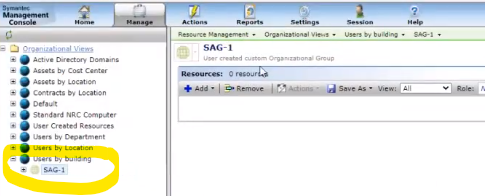
Note: if you were to create a new Organizational View for Users in a certain building, create a new one and called it for example "Users to building" and add an Organizational Group with the name of the building.
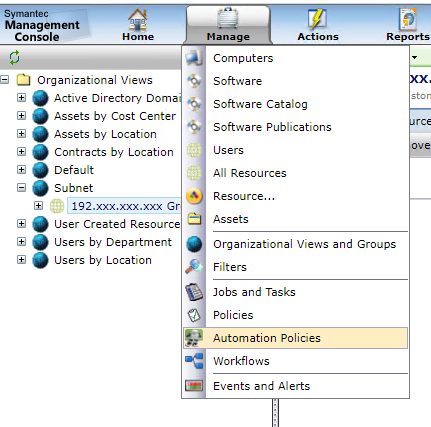
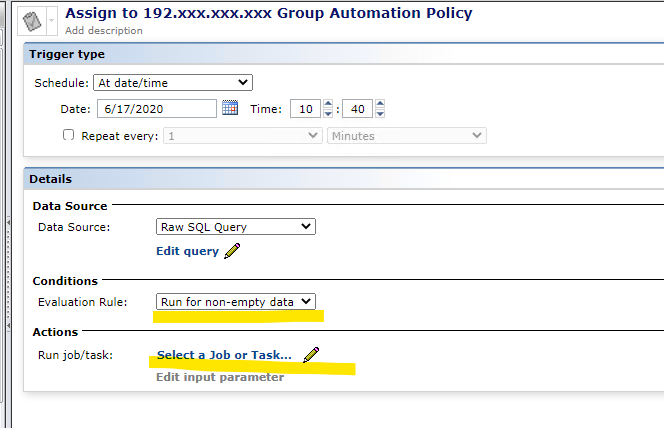
8. At the top of the SMP Console click on Manage and then choose Automation Policies
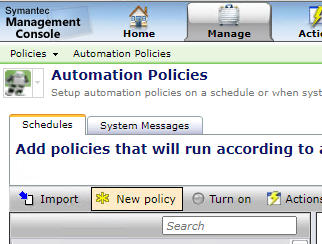
9. On the Schedules tab, above the left pane, click on “New policy”.
10. Name the new policy "Assign to 192.xxx.xxx.xxx Group" and click OK
11. In the right-hand pane set the schedule to anything you would like it to be
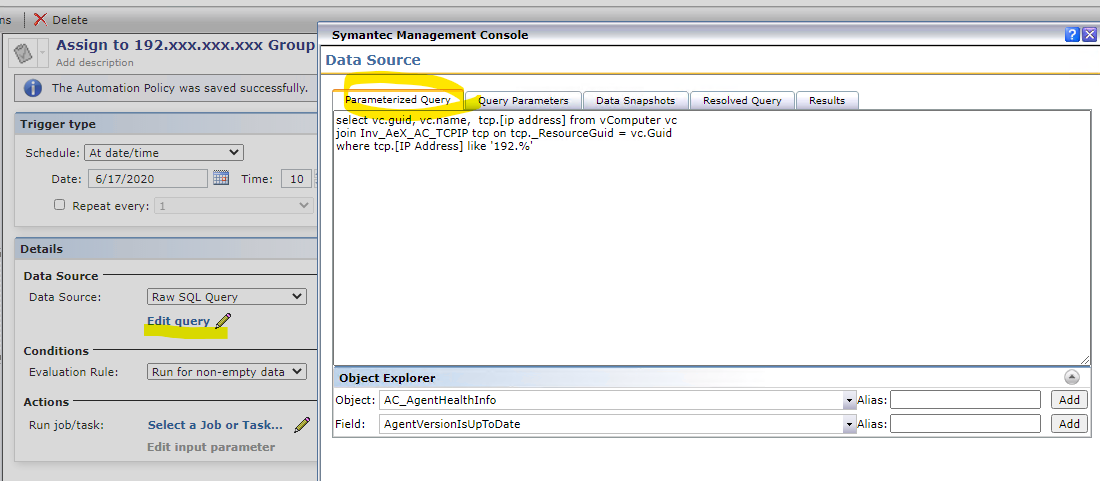
12. In the details section set the data source to be a Raw SQL query
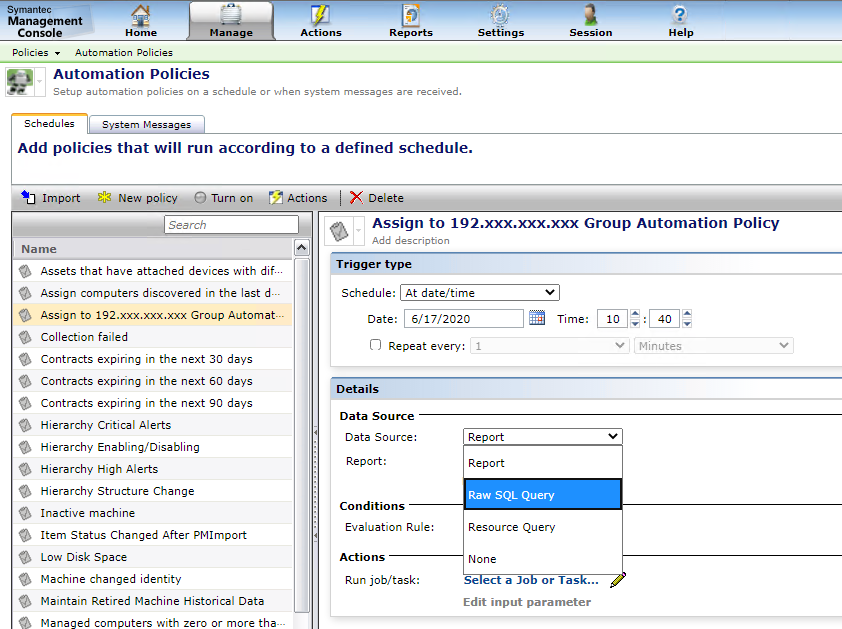
13. Click on Save changes
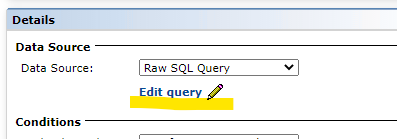
14. Click on Edit query
15. Put a query that returns the resources you want to add to the organizational group into the Parameterized Query Pane.
For example:
select vc.guid, vc.name, tcp.[ip address] from vComputer vc
join Inv_AeX_AC_TCPIP tcp on tcp._ResourceGuid = vc.Guid
where tcp.[IP Address] like '192.%'
For example:
select vc.guid, vc.name, tcp.[ip address] from vComputer vc
join Inv_AeX_AC_TCPIP tcp on tcp._ResourceGuid = vc.Guid
where tcp.[IP Address] like '192.%'
16. Click OK
17. Leave the Evaluation Rule Condition to "Run for non-empty data"
18. Click on select a job or task
19. Click on the + in front of the folder System Jobs and Tasks
20. Click on the + in front of the folder Notification Server
21. Click on the + in front of the folder Automation Policy Tasks
22. Choose the Assign to Organizational Group Task
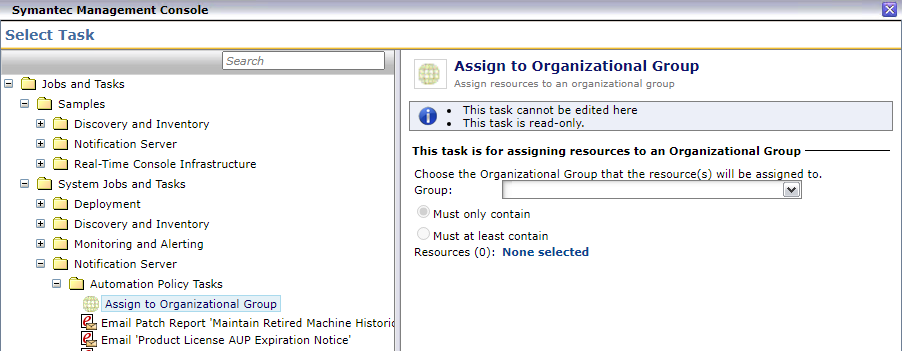
23. Click OK
24. Click on Edit input parameter
25. For Organizational Group select the 172.xxx.xxx.xxx Group in the Custom Value Dropdown
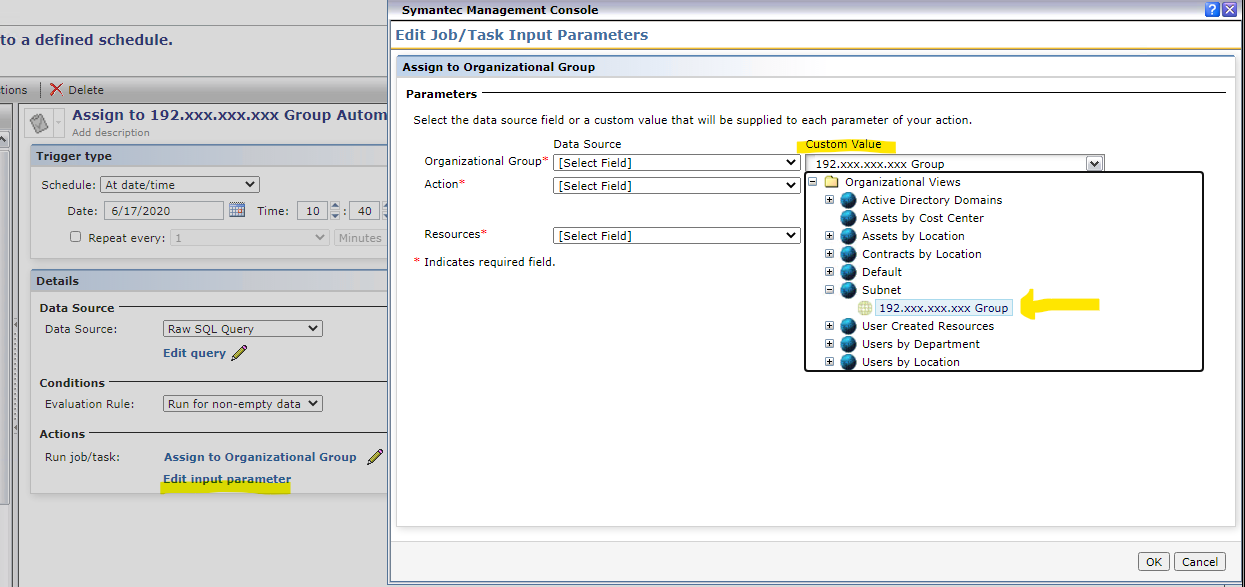
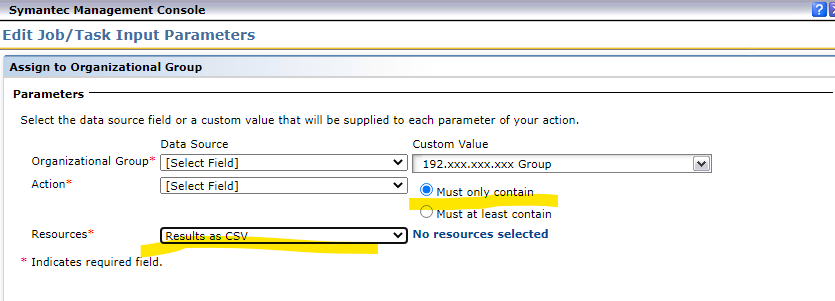
26. For Action click on Must at least contain
27. For Resource choose Results as CSV in the dropdown menu
28. Click OK
29. Click Save Changes button
30. Click Test Automation Policy
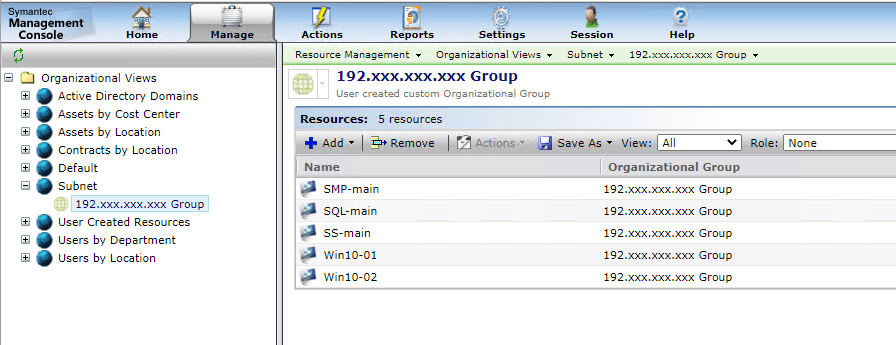
31. In the SMP Console click on Manage and then choose Organizational Views and Groups
32. Click on 192.xxx.xxx group. You will see all of the resources that have been assigned to the group through the automation policy.
33. If it populates what you need, don't forget to "enable" the Automation policy that you created so it can run on the specified schedule.
Additional Information
178901 "How can I create an Automation Policy to move computers into an Organization Group"
Feedback
Yes
No
Powered by
