Steps for Attaching an iSCSI Target to a Windows Server/Client System
Article ID: 382808
Updated On:
Products
Issue/Introduction
This guide provides practical steps to connect iSCSI targets to Windows servers and clients. It covers essential configurations and troubleshooting tips to ensure smooth access to shared storage.
Environment
- VMware vSphere ESXi 6.x
- VMware vSphere ESXi 7.x
- VMware vSphere ESXi 8.x
- Windows server/clients
Resolution
To ensure seamless iSCSI communication between the Windows server (iSCSI initiator) and storage array (iSCSI target), the following prerequisites must be met:
- Network Segmentation:
The iSCSI target and the guest OS on the Windows server must reside on the same network segment. This ensures direct communication without traversing network boundaries, minimizing latency and potential network issues. - iSCSI Qualified Name (IQN):
The iSCSI target must be properly configured with a unique iSCSI Qualified Name (IQN) within the storage array's management interface. This acts as a globally unique identifier for the target, allowing the initiator to locate and connect to it. - Initiator Connectivity Validation:
Verify successful communication between the Windows server's iSCSI initiator and the iSCSI target through the following methods.
- Ping Test:
Use theping -S <X.X.X.X> <Y.Y.Y.Y>command to test network connectivity between the initiator's IP address (X.X.X.X) and the target's IP address (Y.Y.Y.Y). A successful response indicates network connectivity. - Telnet Test:
Utilizetelnet <Y.Y.Y.Y> 3260to verify that the target's iSCSI listener service is active and responsive. Success implies the target is accessible through its iSCSI port (3260).
- Ping Test:
Procedure to connect iSCSI targets on Windows clients:
1. Start the iSCSI Initiator service:
- Open Server Manager: Navigate to the Server Manager console on your Windows server.
- Locate iSCSI Initiator: Access the "iSCSI Initiator" command through the "Tools" menu or search for it using the Windows search bar.
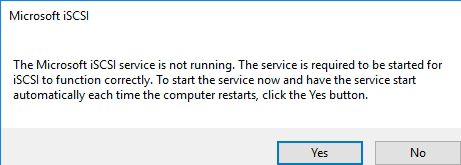
- Enable the service: If the Microsoft iSCSI service is not running, a prompt will appear. Click "Yes" to enable the service and ensure it starts automatically on every Windows boot.
2. Discover and connect to the iSCSI target:
- Open iSCSI Initiator Properties: In the iSCSI Initiator window, access the "Properties" dialog.
- Enter target IP address: Input the IP address of your iSCSI target within the "Target" field.
- Quick Connect: Click the "Quick Connect" button. The iSCSI Initiator will discover your target based on the provided IP address.
- Select and connect: Choose the discovered target from the list and click the "Connect" button.
- Note: This assumes the target is not configured with CHAP authentication. If CHAP is enabled, you will need to provide the appropriate username and password for authentication during this step.
3. Configure and initialize the iSCSI disk:
- Navigate to "Volumes and Devices": Go to the "Volumes and Devices" tab within the iSCSI Initiator Properties window.
- Auto Configure: Click the "Auto Configure" button. This action will scan for newly attached iSCSI volumes and attempt to automatically discover and configure them.
- View iSCSI volumes: After auto configuration, you should see a list of the discovered iSCSI volumes. Click "OK" to finalize the process.
- Open Disk Management: Launch the Disk Management console by running the command "
DISKMGMT.MSC". - Locate iSCSI disk: Identify the newly attached iSCSI disk within the Disk Management console.
- Bring disk online: Bring the iSCSI disk online by right-clicking on it and choosing "Online".
- Initialize disk: Right-click on the online disk and select "Initialize Disk". Choose the appropriate partition style (MBR or GPT) based on your needs and the disk size.
- Create a volume: After initializing, right-click on the unallocated space on the disk and select "New Simple Volume".
- Format the volume: Follow the on-screen wizard to format the newly created volume with your desired file system (e.g., NTFS) and assign a drive letter.
Additional Information
CHAP authentication: If CHAP authentication is enabled on the iSCSI target, ensure you provide the correct credentials during the connection process (Step 2).
Multipathing: For increased resilience and performance, you might consider implementing multipathing in your environment. This enables multiple connections to the iSCSI target, distributing the workload across different network paths.
Storage array documentation: Refer to your specific storage array's documentation for detailed configuration instructions, troubleshooting tips, and additional security considerations.
Feedback
