How to configure APS (Advanced Password Services) Help Desk Interface (APSAdmin)
Article ID: 36068
Updated On:
Products
CA Single Sign On Secure Proxy Server (SiteMinder)
CA Single Sign On Agents (SiteMinder)
CA Single Sign On Federation (SiteMinder)
CA Single Sign On SOA Security Manager (SiteMinder)
CA Single Sign-On
SITEMINDER
Issue/Introduction
The Help Desk Interface (APSAdmin) is designed to be a highly flexible, very secure tool that can be used by your Help Desk personnel to reset passwords and enable/disable user accounts. It also has some more generic user view/update capabilities.
Following steps will guide you through configuring APS Help Desk Interface starting with SiteMinder release r12.52.xx.xx.
Prerequisites:
- APS is enabled on the Policy Server.
- APS schema is created for all the user entries.
- Virtual directory for Change Password(SmCPW) & Forgot Password (FPS) is already configured.
- SmPortal.cfg is already configured (If not, steps are provided below on how to do this )
Environment
Web Agent Release: 12.52 (Applicable to ONLY 12.52.xx.xx CGI model " Webagent " releases) (With 12.8 Webagent releases, we are NOT supporting CGI Configuration).
Component: Siteminder Webagent
Policy Server Release: Supported to all the fully supported " Policy Server " releases (12.8.xx).
Resolution
====== Policy Database Configuration ======
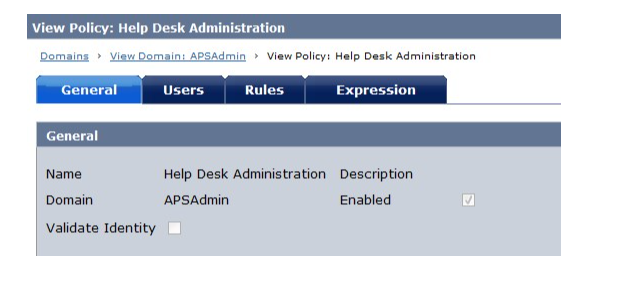
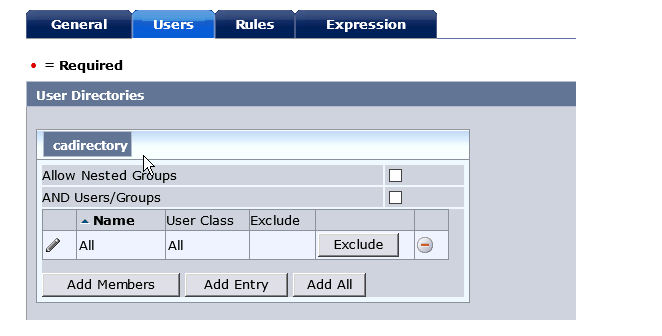
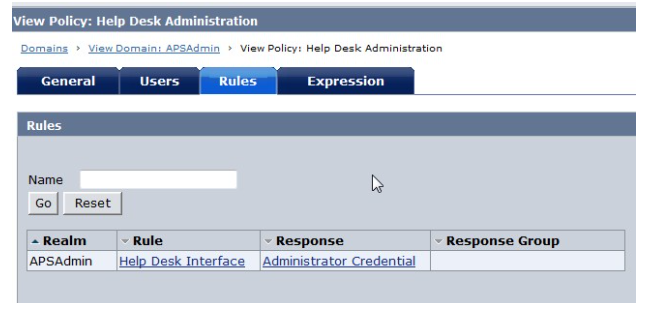
====== Web Server Configuration (For illustration purpose, we will use IIS 7.5 web server) ======
------ Define a virtual CGI directory for the directory that contains the APSAdmin CGI Program
- Using the CA SiteMinder Administrative UI (the Policy GUI), create a new Policy Domain called "APS Help Desk Interface".
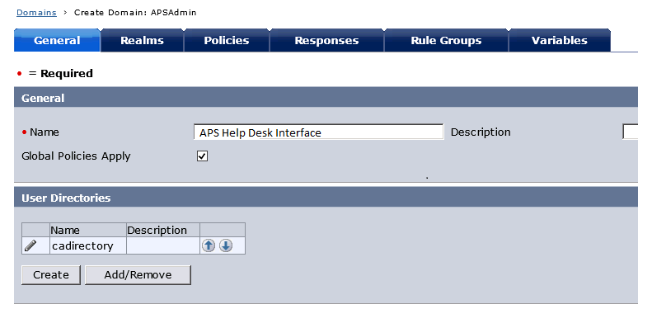
- Within the new Policy Domain, define a Realm named APSAdmin. This realm should be associated with the Agent or Agent Group corresponding to the Web Server(s) upon which this code was installed. Be sure to use this agent/agent group for this realm. The Resource Filter /APSAdmin/. The Authentication Scheme is whatever is appropriate for your site.
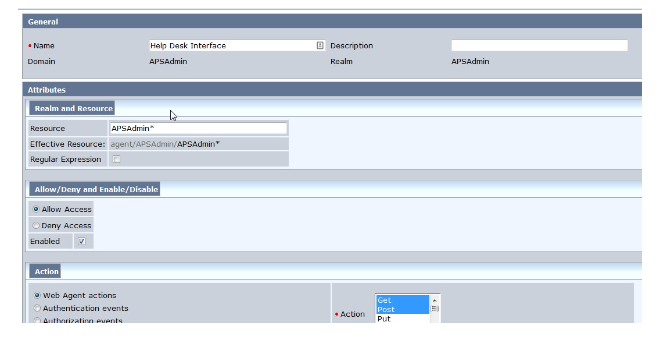
- Define a Rule within this Realm called "Help Desk Interface". The Resource will be APSAdmin*. The Action is GET and POST.
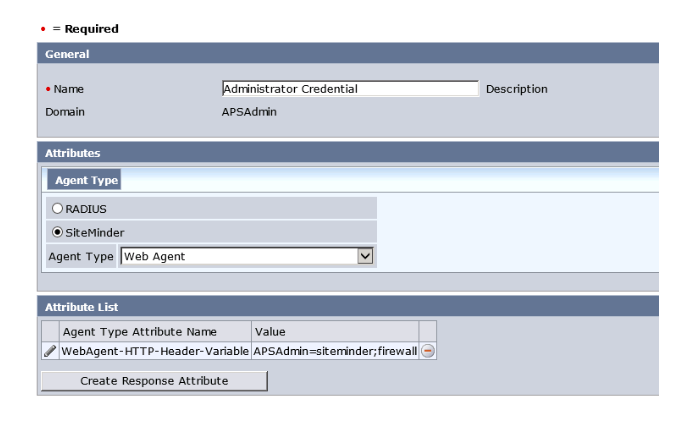
- Define a Response called "Administrator Credentials". This response needs a single Attribute. This attribute needs to have a type of "WebAgent-HTTP-Header-Variable". Select "Static" as the Attribute Kind. The VariableName field should be set to "APSAdmin". The Variable Value must contain a CA SiteMinder Administrator name, followed by a semicolon, followed by that administrator’s password. Note that this is a CA SiteMinder Administrative UI administrator (the credentials used to log into the CA SiteMinder Policy Server GUI, not into the Web Site). This administrator must be defined to CA SiteMinder with "Manage Users" and "Manage System and Domain Objects" rights.
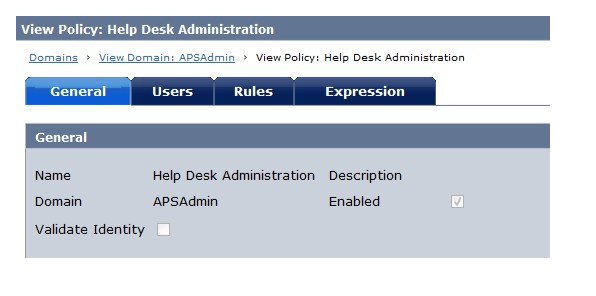
- Create a Policy called "Help Desk Administration". Select those users that should have access to this interface. The "Help Desk Interface" rule defined above should be specified. The "Administrator Credentials" response should be tied to the rule.
====== Web Server Configuration (For illustration purpose, we will use IIS 7.5 web server) ======
------ Define a virtual CGI directory for the directory that contains the APSAdmin CGI Program
- Open IIS Manager ( type "inetmgr.exe" in the Run window and click enter)
- Right Click on the Default Web Site and select Add Virtual Directory option. The virtual directory wizard opens.
Specify as following :
Alias : APSAdmin
Physical path : <Web_Agent_Installation_Directory>\win32\bin\Web\APSAdmin
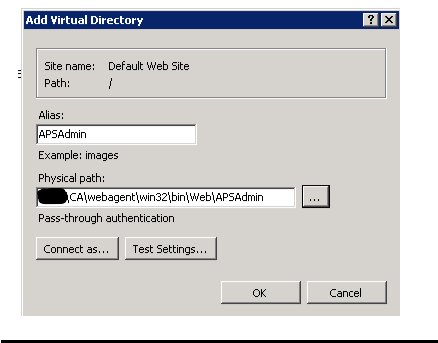
Click Ok
------ Add ISAPI and CGI Restrictions for APSAdmin CGI
- Open IIS Manager and navigate to the server level.
- Double Click on ISAPI and CGI Restrictions
- From the Action menu click "Add" to add new restrictions
Specify as following :
ISAPI or CGI path: <Web_Agent_Installation_Directory>\win32\bin\Web\APSAdmin\APSAdmin.exe
Description : APSAdmin
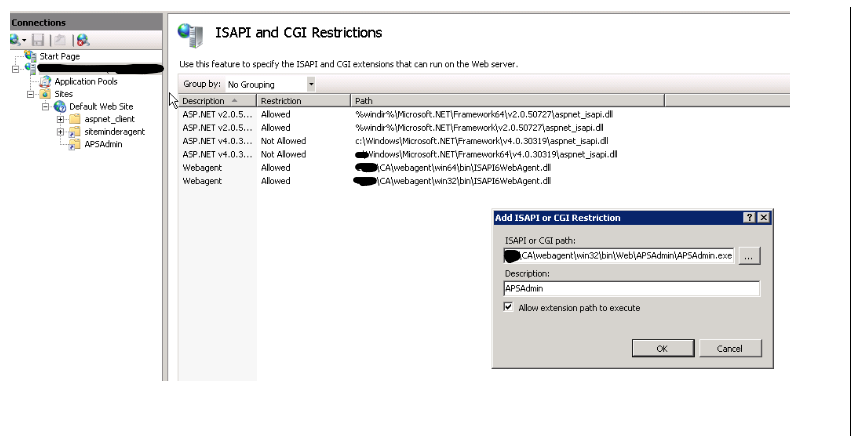
Click Ok
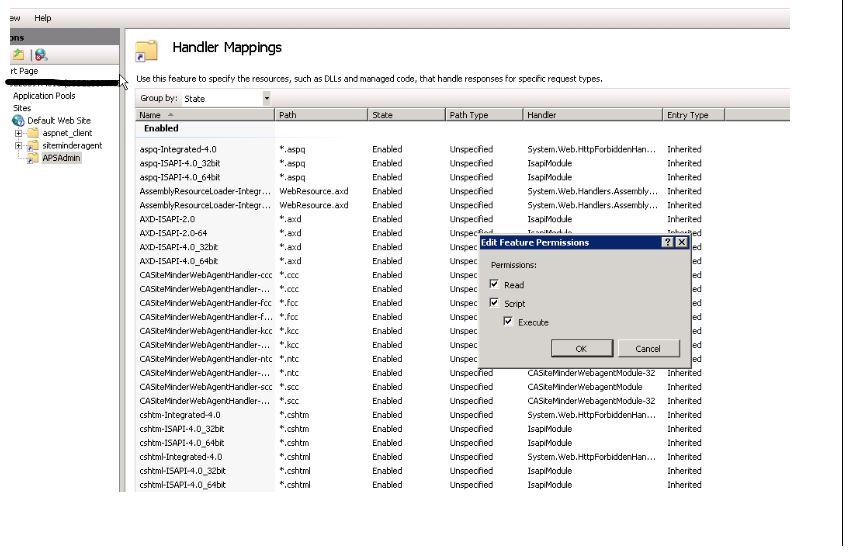
------ Edit Feature Permissions for the Handler Mappings Feature for APSAdmin Virtual Directory
Open IIS Manager and navigate to the APSAdmin virtual directory level.
In the Features View , double click Handler Mappings.
In the Actions pane, click Edit Feature Permissions.
In the Edit Feature Permissions dialog box, do the following:
Specify as following :
Select Read
Select Scripts
Select Execute
Click Ok
------ Modify the default SmPortal.cfg file installed.
Note :
- If you have already configured Change Password (SMCPW) & Forgot Password (FPS) Interface following steps would probably have already been done.
- For Help Desk Interface, it actually doesn't have anything to do with the SmPortal.cfg configuration but due to a bug in the APS code, it is required that following settings are configured before you could access Help Desk Interface.
- In future releases, you might probably be able to do away with the following steps.
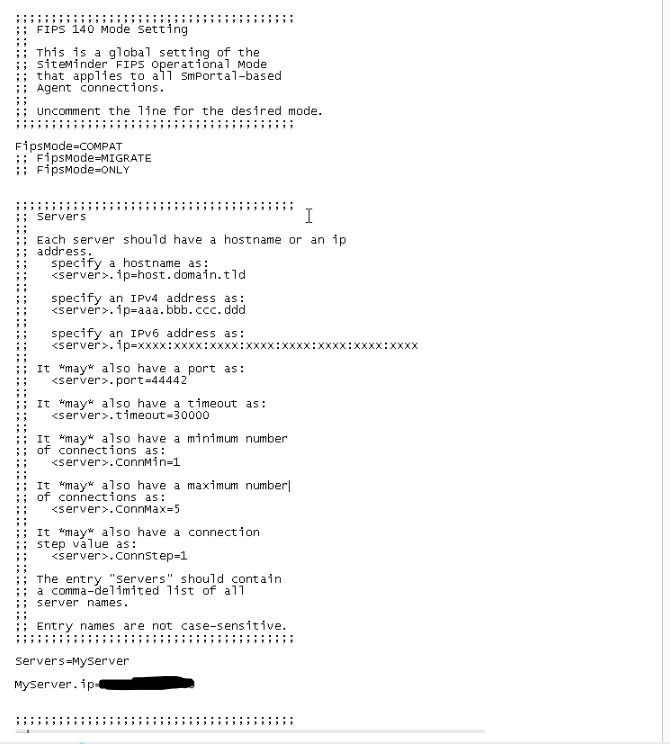
Edit the SmPortal.cfg file located at <Web_Agent_Installation_Directory>\win32\bin folder.
Specify as following :
MyServer.ip = <Your Policy Server IP address>
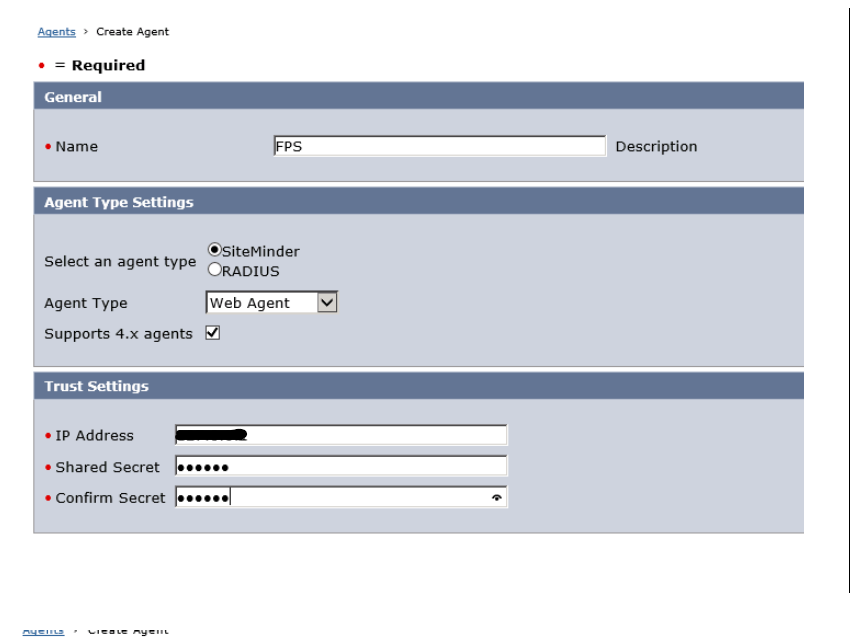
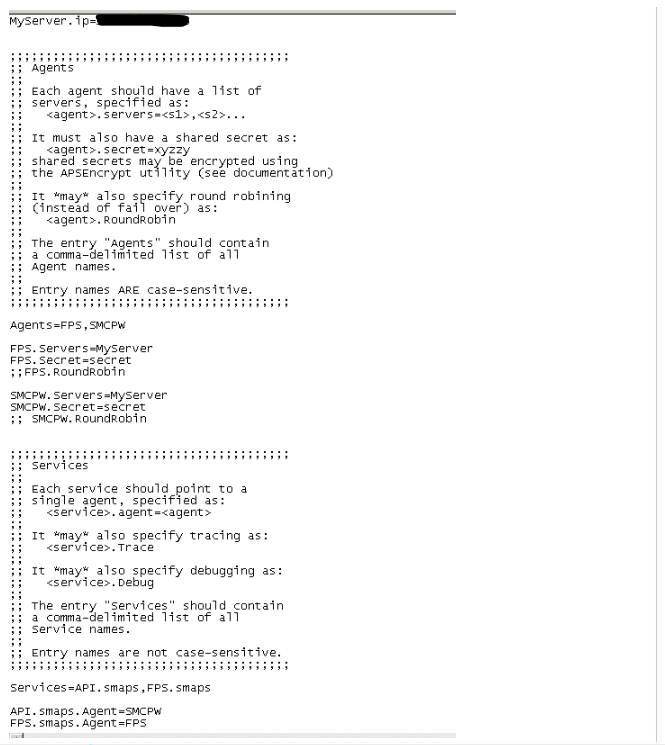
By default, FPS is configured with a 4x agent by name "FPS" with shared secret "secret"
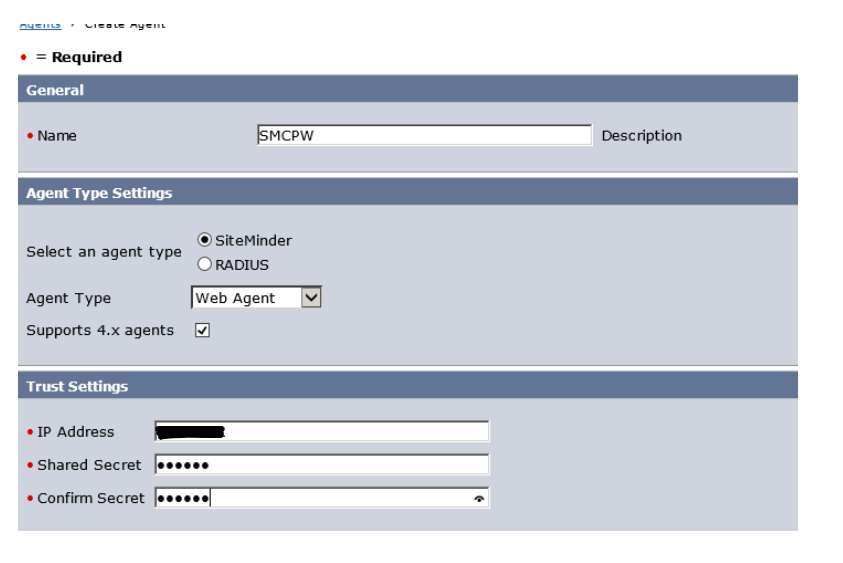
Change password is configured with a 4x agent by name "SMCPW"" with shared secret "secret"
By logging into the Administrative UI create the matching 4x agent as below:
The final SmPortal.cfg should look like following :
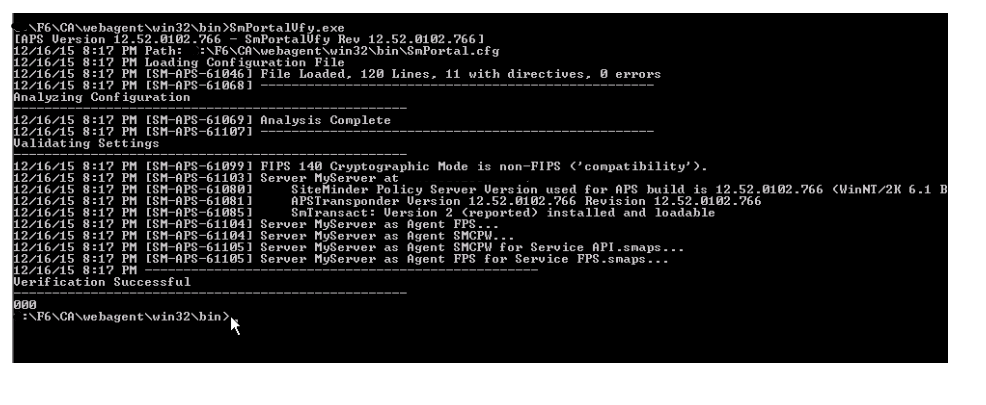
------ Validate SmPortal.cfg configuration using the SmPortalVfy.exe tool located at <Web_Agent_Installation_Directory>\win32\bin folder. It should state the verification as successful as below :
------ Testing & Verification:
1. Access Help Desk Interface UI
e.g. http://<server.domain.com>/APSAdmin/APSAdmin.exe
2. Provide valid user credential
3. Once the access to the interface is authorized, you will be prompted to enter the USER DN of the user which you want to manage.
Enter the full user DN.
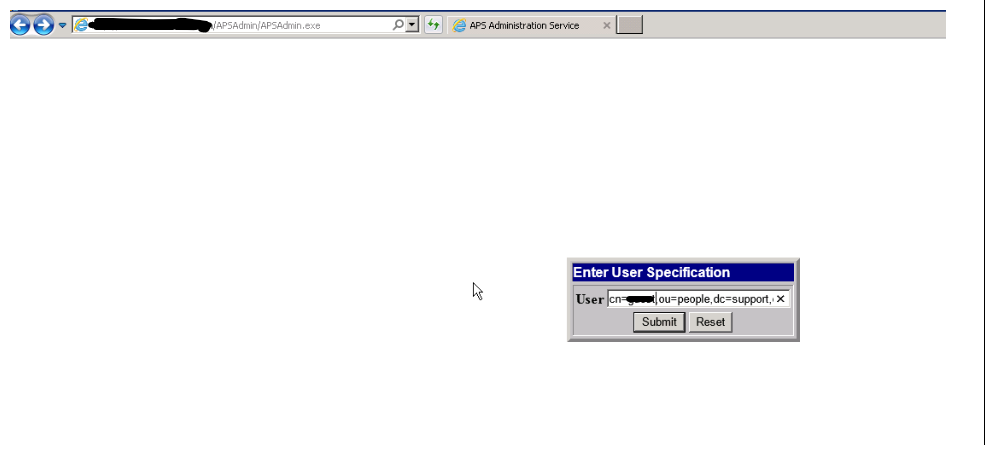
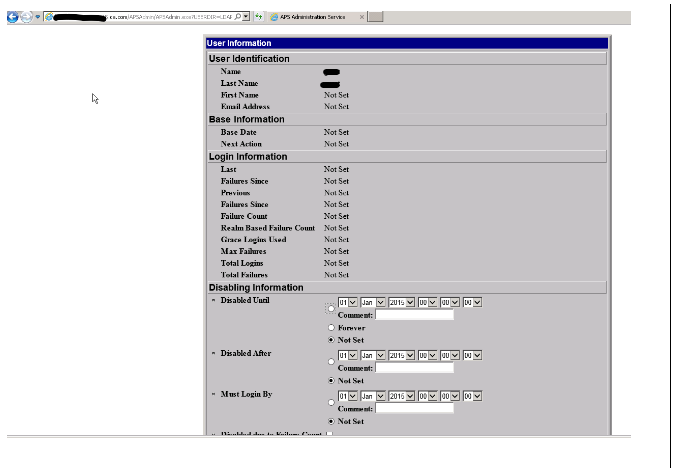
4. Next, screen should now show the User Information screen for the user.
Feedback
Yes
No
