[VMConAWS] Generating a kernel dump to investigate VM Unresponsive issue
Article ID: 345379
Updated On:
Products
VMware Cloud on AWS
Issue/Introduction
When a Compute VM hangs or is unresponsive, you may be unable to investigate the guest OS application or perform VM operations.
Usually in this situation the Memory dump would be required to analyse the cause. Even if the OS is configured to generate a Memory Dump for System Crashes, it might fail to generate a Memory Dump for System Unresponsiveness in most cases.
You can take a snapshot of the machine when it is unresponsive and use vmss2core.exe tool to convert the snapshot to a VM Kernel Dump for review.
Resolution
Please follow the below steps before you Power Off or Reset the VM in order to remedy the VM state.
Note: You may prefer to suspend the affected VM and replace vmsn with vmss in the below steps. The tool can convert both (.vmsn) and (.vmss).
1. Select the Unresponsive VM and generate a snapshot through VM Actions > Snapshots > Take Snapshot (Include Memory).
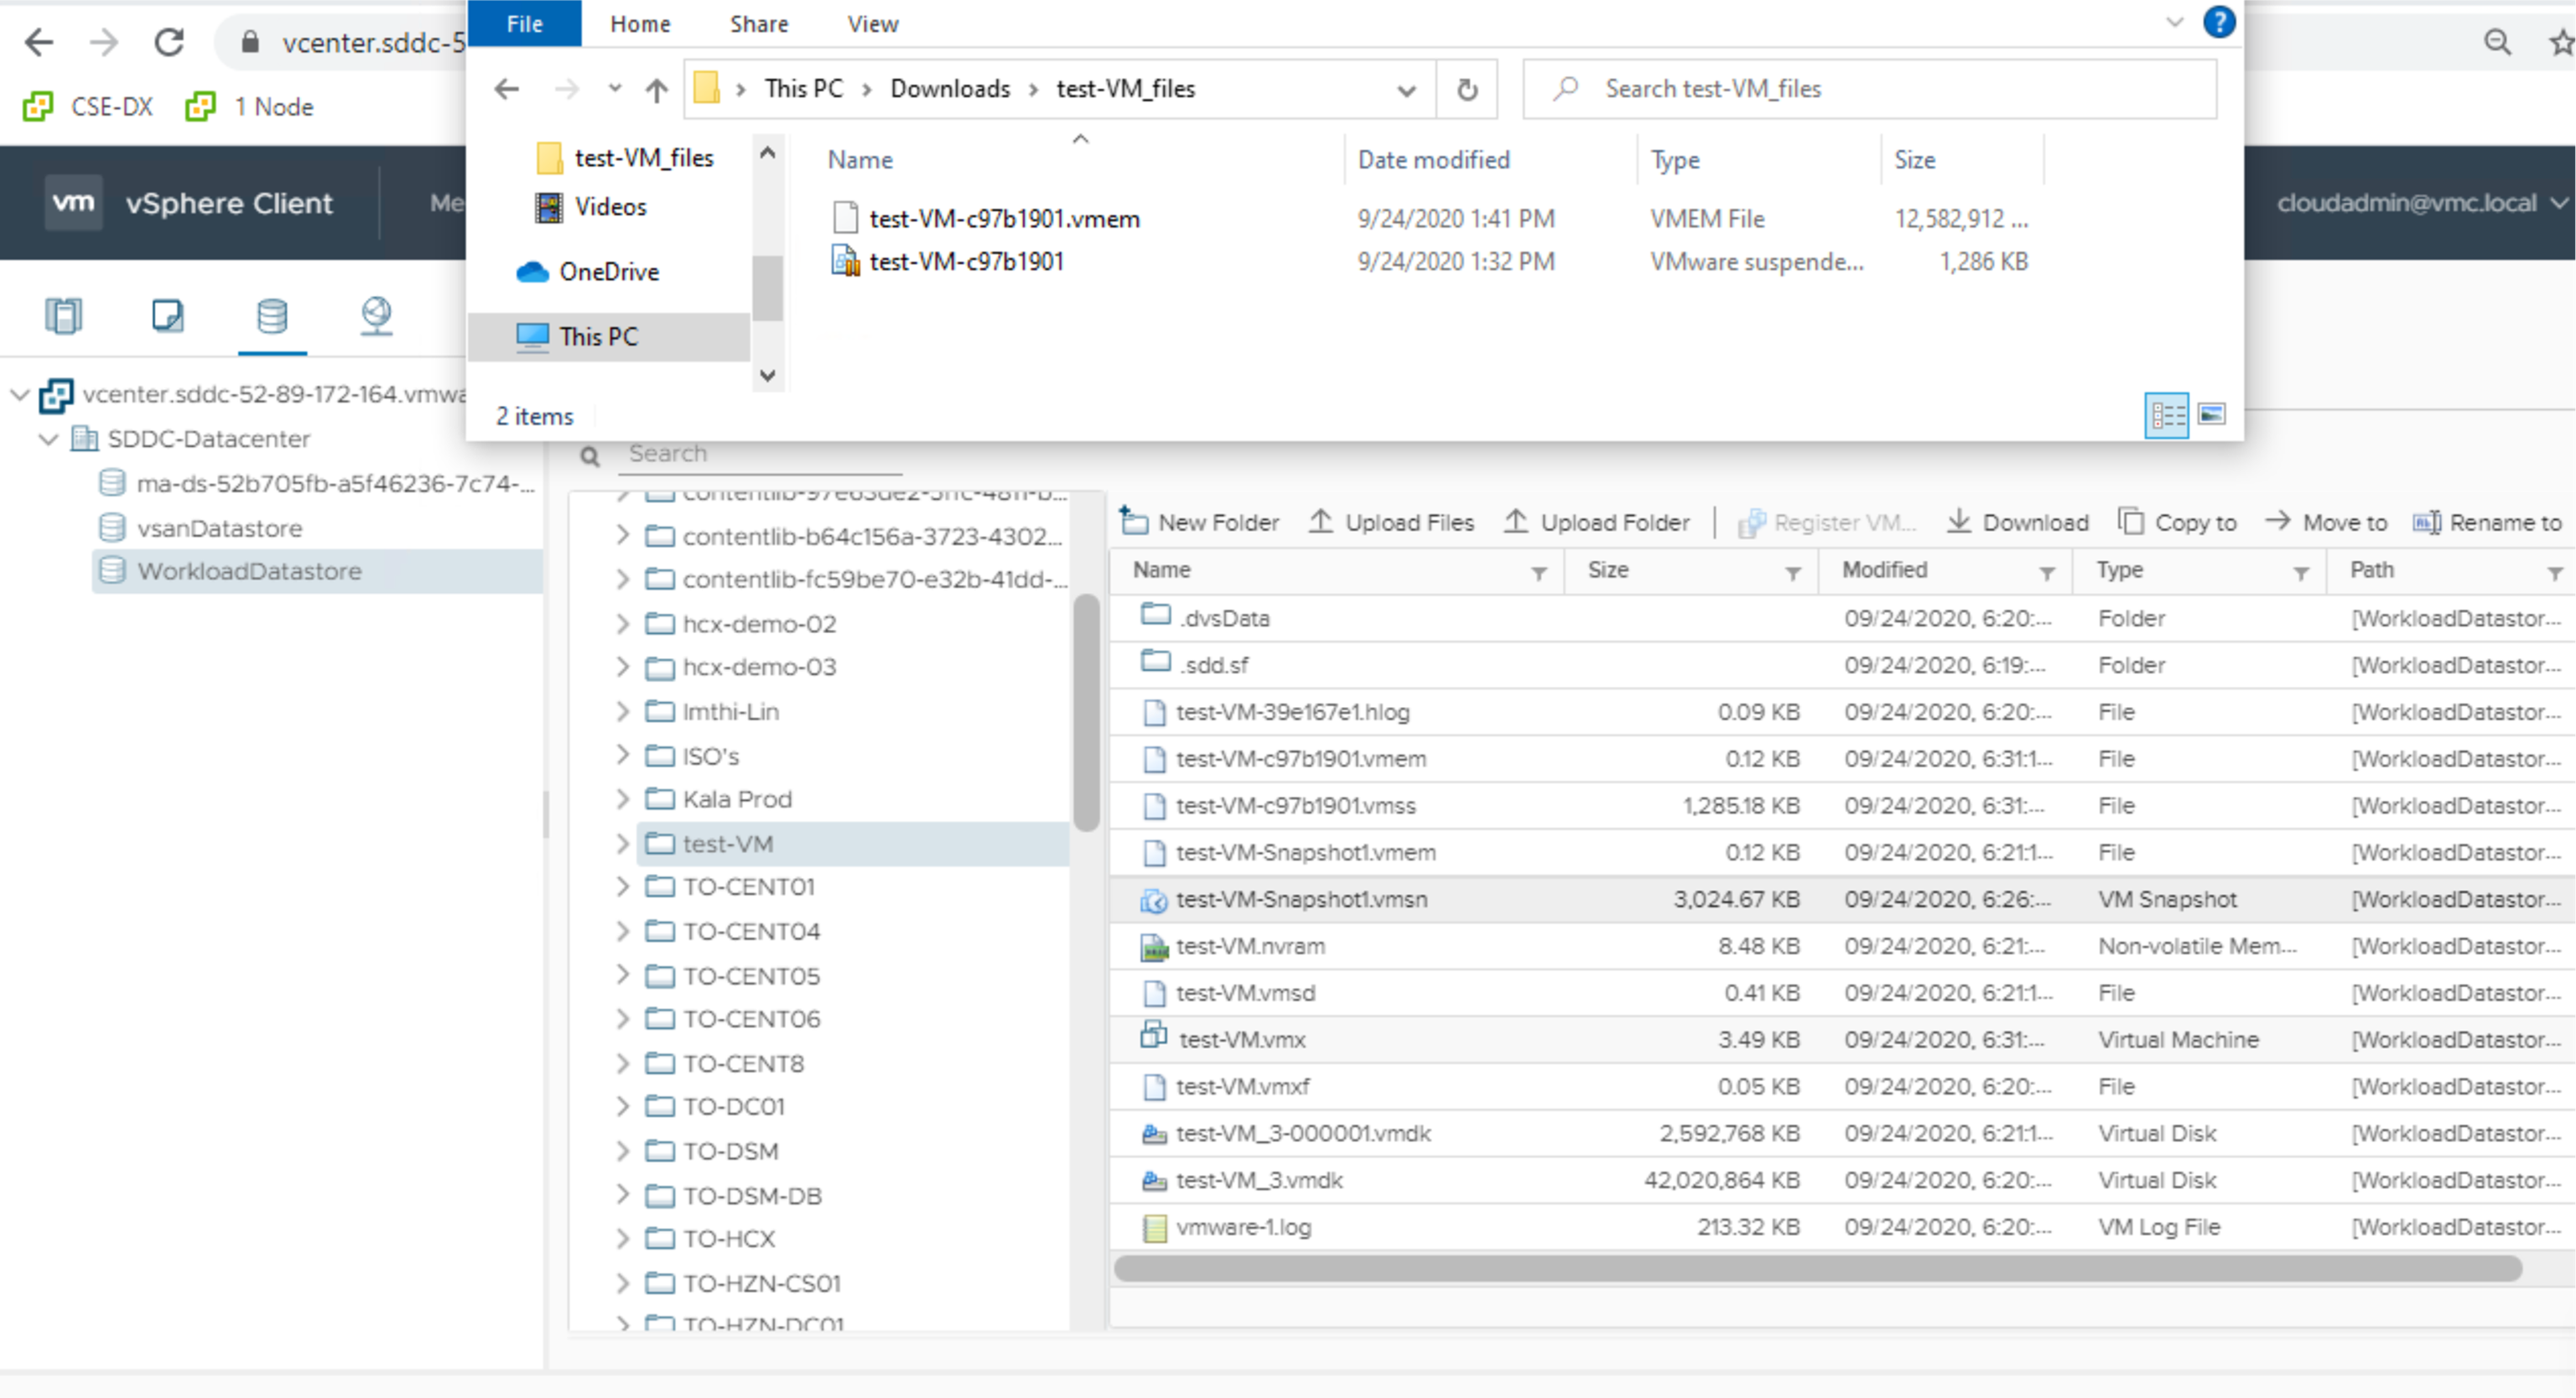
2. Navigate to the VM Folder under WorkloadDatastore:
In this folder locate the snapshot file.
There will be a snapshot (.vmsn) and a memory (.vmem) file. e.g. ComputeVM-Snapshot3 with different suffixes (vmsn and vmem).
If there are different snapshots, e.g. ComputeVM-Snapshot1, 2, 3, etc then locate the correct files for your recent snapshot or suspension by examining time/date stamps.
3. Download the files that are present (.vmsn and .vmem) for the snapshot. Select the file and click Download from VM folder options on top and save them to a folder on your local machine.
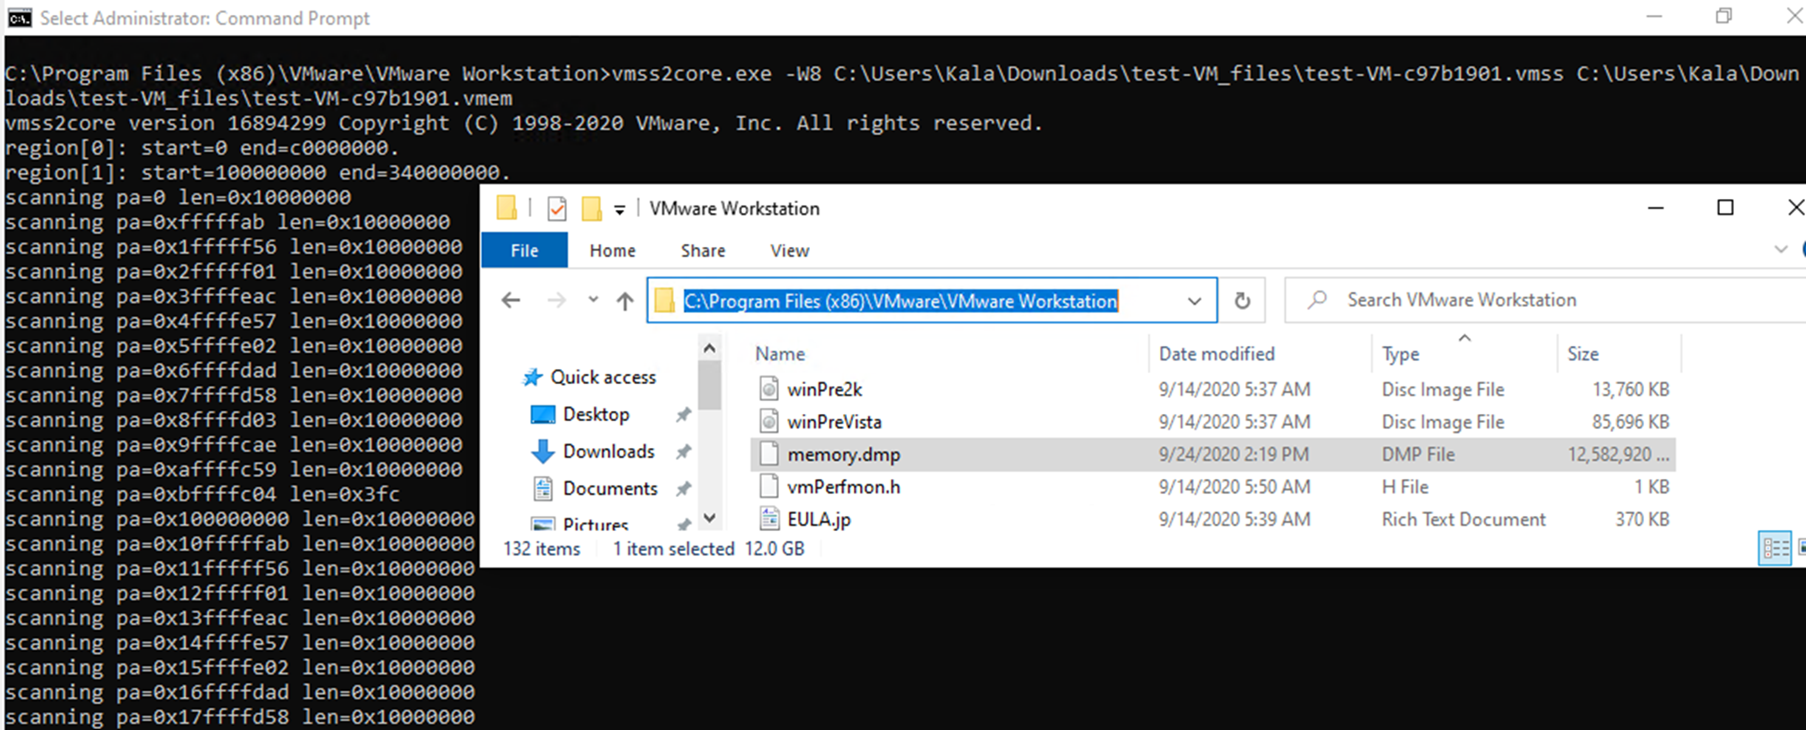
4. Download VMware Workstation to leverage "vmss2core.exe" utility to convert the files into a VM Kernel Dump.
5. Open Command Prompt and change the directory to the location of VMware workstation, default location : C:\Program Files (x86)\VMware\VMware Workstation
Execute the following command:
vmss2core.exe -W8 "C:\temp\VM\Problem-VM-c97b1901.vmss" "C:\temp\VM\Problem-VM-Snapshot1.vmem"
Note: If the OS in VM is Microsoft Windows 8/8.1 or Windows Server 2012, run this command:
vmss2core -W8 virtualmachine-snapshot.vmsn virtual_machine_name.vmem
6. Once the Memory Dump (Memory.dmp) is created, Windbg tool could be used for analysing it.
Note: You may prefer to suspend the affected VM and replace vmsn with vmss in the below steps. The tool can convert both (.vmsn) and (.vmss).
1. Select the Unresponsive VM and generate a snapshot through VM Actions > Snapshots > Take Snapshot (Include Memory).
2. Navigate to the VM Folder under WorkloadDatastore:
In this folder locate the snapshot file.
There will be a snapshot (.vmsn) and a memory (.vmem) file. e.g. ComputeVM-Snapshot3 with different suffixes (vmsn and vmem).
If there are different snapshots, e.g. ComputeVM-Snapshot1, 2, 3, etc then locate the correct files for your recent snapshot or suspension by examining time/date stamps.
3. Download the files that are present (.vmsn and .vmem) for the snapshot. Select the file and click Download from VM folder options on top and save them to a folder on your local machine.
4. Download VMware Workstation to leverage "vmss2core.exe" utility to convert the files into a VM Kernel Dump.
5. Open Command Prompt and change the directory to the location of VMware workstation, default location : C:\Program Files (x86)\VMware\VMware Workstation
Execute the following command:
vmss2core.exe -W8 "C:\temp\VM\Problem-VM-c97b1901.vmss" "C:\temp\VM\Problem-VM-Snapshot1.vmem"
Note: If the OS in VM is Microsoft Windows 8/8.1 or Windows Server 2012, run this command:
vmss2core -W8 virtualmachine-snapshot.vmsn virtual_machine_name.vmem
6. Once the Memory Dump (Memory.dmp) is created, Windbg tool could be used for analysing it.
Feedback
Yes
No
Powered by
