Apply Notification List filter to a role
Article ID: 332919
Updated On:
Products
VMware Smart Assurance
Issue/Introduction
Notification List filters that are created from Smarts can be imported and applied to a M&R role. A filter can be also applied directly on the Notifications report from Watch4net. However, if wildcards and multiple conditions are needed to filter down the list, it is better to create the filter from Smarts Global Manager Administration Console.
Environment
Watch4Net/M&R - 7.x
Smarts - 10.1.x
Resolution
Step 1. Creating a Notification List from Smarts Global Administration Console
5. Create an expression filter or type the name of an ASL Filter prefaced by the name of the BASEDIR/smarts/local/rules directory in which it is located, and click Next.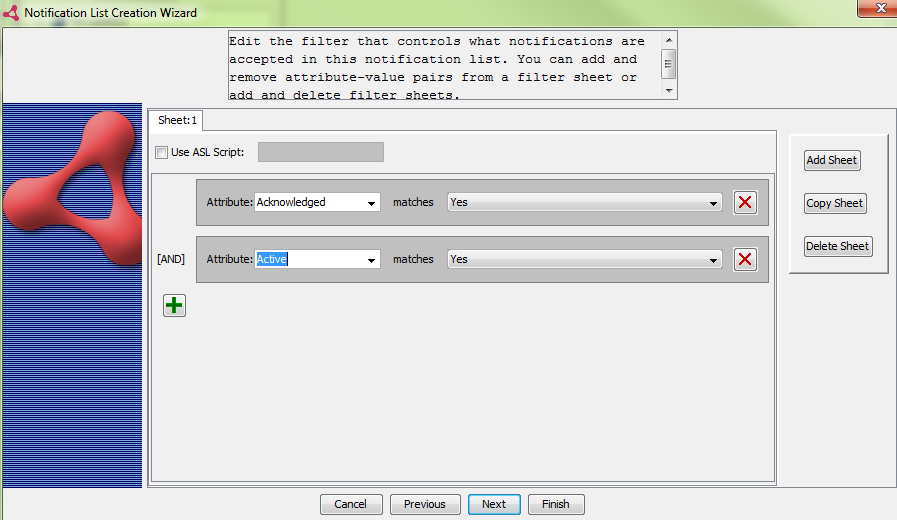
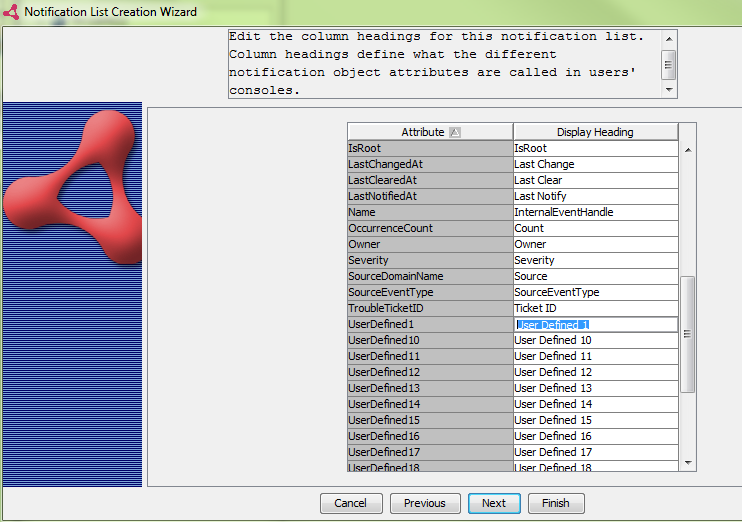
6. Edit the column headings that are displayed in the notification log. The left column lists the attributes included in a notification. The right column lists the columns names as they are currently displayed. You can edit the values in the right column by double-clicking a field.
7. Do one of the following:
Step 2. Assign the Notification List to a User Profile
1. In Global Administration Console, go to User Profiles and select the profile (e.g. admin-profile)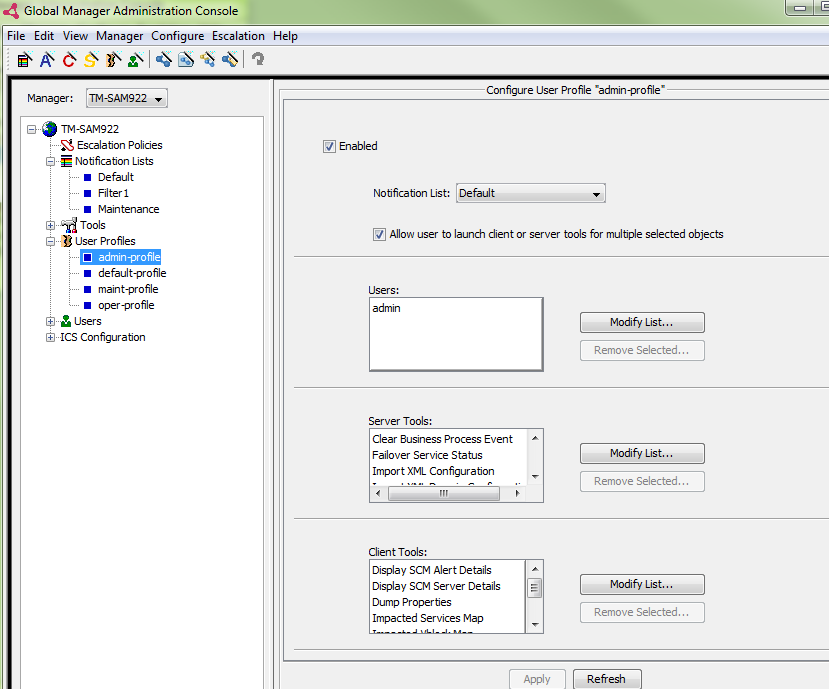
2. From Notification List drop-down menu, choose the Notification List created in Step 1. Default selection is called 'Default'.
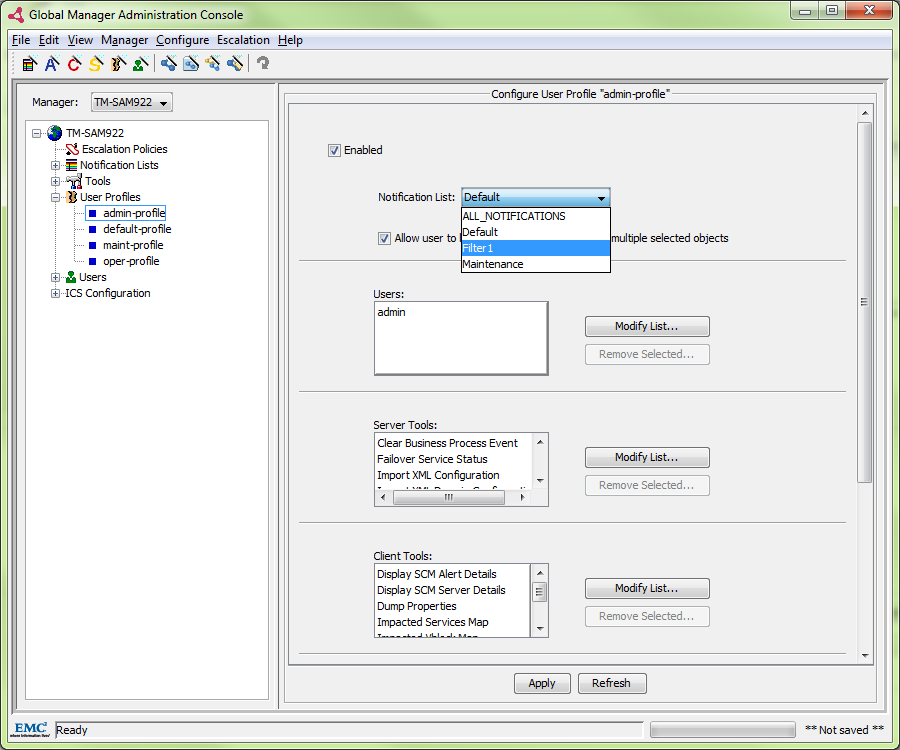
3. Save changes.
Step 3. Map Smarts User Profile to Watch4net Role
Mapping of Smarts user profile to Watch4net role is described on KB 333477
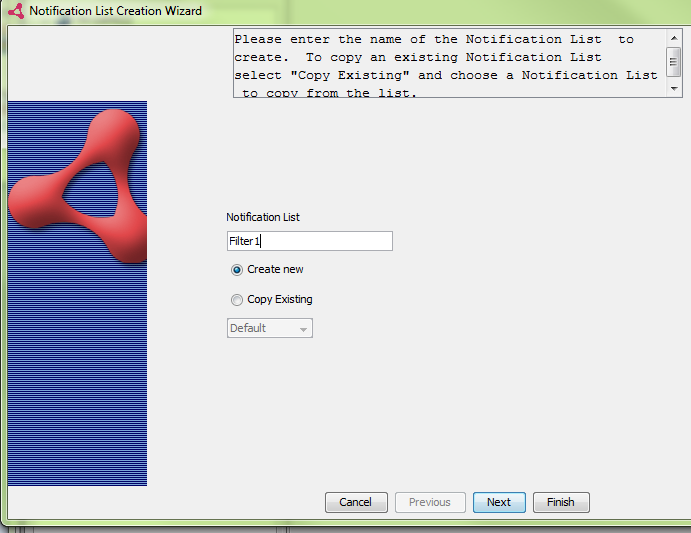
1. Select the Launch Notification List Wizard toolbar button.
The Notification List Creation Wizard appears.

2. Type a unique name for the Notification List.
3. Choose to create a new notification list or copy an existing notification list:
- If a new notification list is being created, all of the filter properties are empty.
- If you copy a notification list, the notification list properties contain the same values as the copied list.
5. Create an expression filter or type the name of an ASL Filter prefaced by the name of the BASEDIR/smarts/local/rules directory in which it is located, and click Next.
- Click Next to view the confirmation panel.
- Click Finish to create the notification list.
Step 2. Assign the Notification List to a User Profile
1. In Global Administration Console, go to User Profiles and select the profile (e.g. admin-profile)
Step 3. Map Smarts User Profile to Watch4net Role
Mapping of Smarts user profile to Watch4net role is described on KB 333477
Feedback
Yes
No
Powered by
