Changing the thick or thin provisioning of a virtual disk
Article ID: 323114
Updated On:
Products
VMware vCenter Server
VMware vSphere ESXi
Issue/Introduction
This article provides steps to change the provisioning of a virtual disk from thick to thin, or from thin to thick. The procedure uses the vSphere Client and vCenter Server to perform this task.
Environment
VMware vSphere ESXi 7.0.x
VMware vSphere ESXi 8.0.x
VMware vCenter Server 7.0.x
VMware vCenter Server 8.0.x
Resolution
Caution: Before following these procedures, VMware recommends to have a valid backup of the virtual machine and enough space to convert the virtual machine's disk(s) from thin to thick.
To change vmdk from Thin to Thick provisioning
To change the provisioning of a virtual machine base disk from thin to thick from the Datastore Browser:
- Power off the virtual machine.
- In vSphere Client, right-click the virtual machine in the inventory.
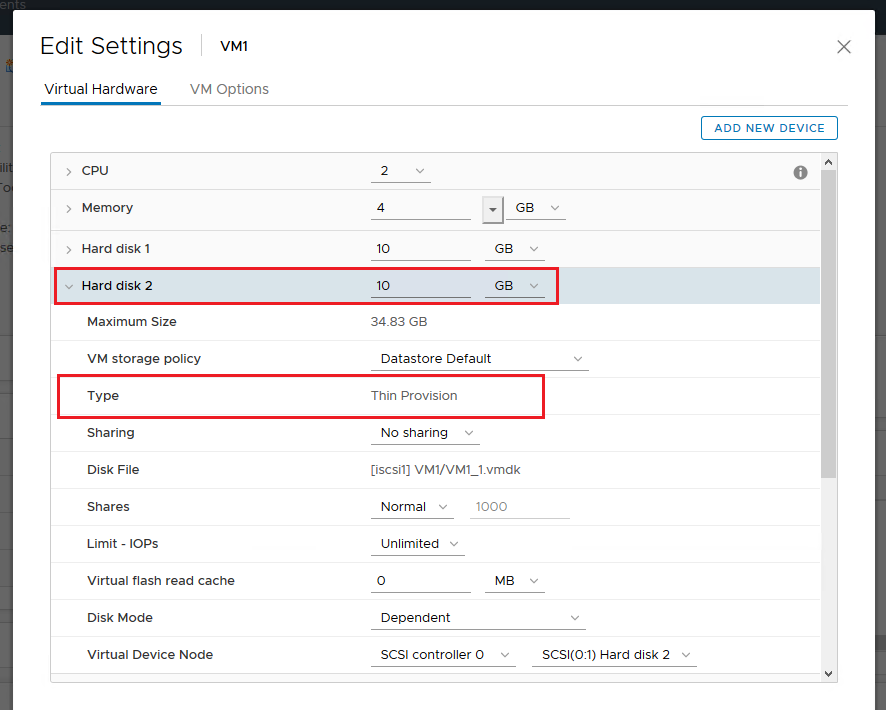
- Click Edit Settings to display the Virtual Machine Properties dialog box.
- Select the appropriate hard disk in the Hardware list.
Note: The Disk Provisioning Type section on the right displays either Thin Provision or Thick Provision.

- Click Cancel to exit from Virtual Machine Properties dialog box.
- Navigate to the datastore where the VM/ VM disk resides that was identified in Step 4 under Files
- Select the disk in question, and in the status bar above, you should find the Inflate option. The Inflate option converts the disk to thick provisioned eager zeroed.
- Once you've selected the inflate option, you should be seeing a task getting created for the vmdk inflation at the bottom in the Recent Tasks tab. This task usually takes sometime to complete depending on the performance of the array.
- After the inflation task is completed, if the VM in question is not reflecting the change, reload the .vmx file. For more information, see Reloading a vmx file without removing the virtual machine from inventory
Notes:
- If the Inflate option is grayed out, it indicates that the virtual machine is not powered off or that it is not thin provisioned.
- There should be no snapshots and the conversion is performed on the base disk.
- Alternatively, a thin disk can be converted to thick via Storage vMotion (by changing the disk format), similar to the method outlined below to convert a vmdk from thick to thin format.
To change VMDK from Thin to Thick Lazy Zeroed:
- This needs to be done using vmkfstools utility which is available in ESXi SSH.
- The first step involves creating a copy of VMDK in thick lazy zeroed format and the second step would be to attach the newly created VMDK to the VM under edit settings.
- The VM needs to be powered off during the entire process.
- SSH to ESXi as root user
- Navigate the VM directory where the VMDKs are saved
- Run the below command in the mentioned syntax to clone the destination disk in lazythickzerored format.
vmkfstools -i /path/to/source.vmdk /path/to/destination.vmdk -d zeroedthick - A successful completion of the above command will look like below.
[root@esxi_shortname:/vmfs/volumes/########-########-####-############/New Virtual Machine_1] vmkfstools -i /vmfs/volumes/iscsi_01/New VirtualMachine_1/NewVirtualMachine.vmdk /vmfs/volumes/iscsi_01/NewVirtualMachine_1/NewVMThicklazy.vmdk -d zeroedthick
Destination disk format: VMFS zeroedthick
Cloning disk '/vmfs/volumes/iscsi_01/New Virtual Machine_1/NewVirtualMachine.vmdk'...
Clone: 100% done. - In the above example:
Source disk: vmfs/volumes/iscsi_01/New VirtualMachine_1/NewVirtualMachine.vmdk
Destination disk: vmfs/volumes/iscsi_01/NewVirtualMachine_1/NewVMThicklazy.vmdk
Format: zeroedthick - Post the above validation go to the VM > Edit settings > Detach the existing disk > Do not select delete from datastore > Save
- Click again on VM edit settings > Add existing disk > Navigate to the location where the cloned disk is saved > select the disk and save
- The VM can now be powered on.
- The old VMDK can be deleted after validating VMs functionality and making sure there are no other issues.
To change vmdk from Thick to Thin provisioning
To convert a virtual machine base disk from thick to thin provisioning by changing the datastore and performing storage vMotion:
Note: This process requires more than one datastore. If only a single datastore exists, you can clone the virtual machine to a destination machine with thin provisioned disks instead of migrating.
- Right-click the virtual machine and select Migrate.
- Select Change storage only and click Next.
- In the next window, select the option configure per disk.
- Select the disk in question which needs to undergo the modification.
- Under Storage category select the destination datastore and under the Disk Format option select Thin Provision.
- Validate the required VM Storage Policy and click Next.
- Review the information on the Review Selections page and click Finish.
Alternatively, virtual machine disks can be cloned to create new Thick or Thin provisioned VMDKs. For more information, see Cloning and converting virtual machine disks with vmkfstools
Additional Information
Feedback
Yes
No
