Pivotal Cloud Foundry upgrade fails with a StacklessAndStackfulMatchingBuildpacksExistError Cloud Controller Error
Article ID: 297768
Updated On:
Products
VMware Tanzu Application Service for VMs
Issue/Introduction
Symptoms:
During a Pivotal Cloud Foundry (PCF) upgrades in versions 2.2.x & 2.3.x.upgrade, you'll see in the logs that the upgrade has failed with the following error message:
During a Pivotal Cloud Foundry (PCF) upgrades in versions 2.2.x & 2.3.x.upgrade, you'll see in the logs that the upgrade has failed with the following error message:
Task ###### | <Timestamp> | Updating instance cloud_controller: cloud_controller/1b6a4e44-3cb9-499c-b322-5ff4e513d6c8 (0) (canary) (<Timestamp>)
L Error: Action Failed get_task: Task 7ff45bd5-1189-4a1a-691a-b470c9020009 result: 1 of 2 post-start scripts failed. Failed Jobs: cloud_controller_ng. Successful Jobs: bosh-dns.
Task ###### | <Timestamp> | Error: Action Failed get_task: Task 7ff45bd5-1189-4a1a-691a-b470c9020009 result: 1 of 2 post-start scripts failed. Failed Jobs: cloud_controller_ng. Successful Jobs: bosh-dns.

Task ###### Started DDD MMM <Timestamp> UTC YYYY
Task ###### Finished DDD MMM <Timestamp> UTC YYYY
Task ###### Duration <Timestamp>
Task ###### error


Updating deployment:
Expected task '######' to succeed but state is 'error'
Exit code 1
In the cloud_controller_ng or post-start.stderr.log file, you can observe the following error:
[YYYY-MM-DD HH:MM:SS+0000] VCAP::CloudController::Jobs::Runtime::BuildpackInstallerFactory::StacklessAndStackfulMatchingBuildpacksExistError:
VCAP::CloudController::Jobs::Runtime::BuildpackInstallerFactory::StacklessAndStackfulMatchingBuildpacksExistError
Environment
Cause
The unique Cloud Controller (CC) error (StacklessAndStackfulMatchingBuildpacksError) as defined in the CC's code:
        # Raised when attempting to install a buildpack,
        # but there are already existing buildpacks with matching names
        # and one has a nil `stack` and another has a non-nil `stack`.
        #
        # As an operator, you can resolve this by deleting the existing buildpack
        # that has a `stack` of nil.
Resolution
This is caused by (but not limited to) the following scenarios:
1. You have locked buildpacks within your cf buildpacks. Buildpacks must be unlocked for PCF to upgrade them to the versions with proper stack associations. PCF does this for you during the PAS tile upgrade. You can do this through the following command: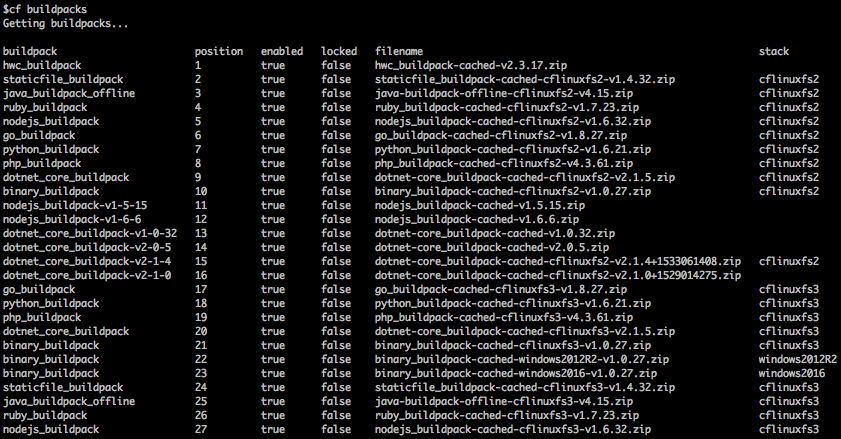
To fix this, you must update the buildpack to have an associated stack, by performing one of the following steps:
1. You have locked buildpacks within your cf buildpacks. Buildpacks must be unlocked for PCF to upgrade them to the versions with proper stack associations. PCF does this for you during the PAS tile upgrade. You can do this through the following command:
cf update-buildpack <buildpack-name> -s <stack> --unlock2. Your cf buildpacks output shows that some buildpacks have an associated stack, but not all. For example:
To fix this, you must update the buildpack to have an associated stack, by performing one of the following steps:
- Use the cf update-buildpack <buildpack-name> -s <stack> command. This should work as of CF-CLI v6.39.0.
- Use cf curl on the Assign Buildpack to Stack CAPI endpoint. For example:
- Obtain the guid of your buildpack through the following command: cf curl /v2/buildpacks
- Look through the JSON output for the name of your buildpack and look for the metadata associated with that buildpack. There will be a guid attribute for that buildpack.
- If you have the excellent jq tool installed, you can run the following command to automatically find your buildpack guid:
Note: Insert the name of your buildpack into this command.
cf curl /v2/buildpacks | jq -r '.resources[] | select(.entity.name == "<buildpack name goes here>") | .metadata.guid
With the buildpack guid, you can now update the stack for that buildpack running the following command:
cf curl -X PUT /v2/buildpacks/<buildpack guid goes here> -d '{"stack": "cflinuxfs3"}'
It also is possible to delete the buildpack through the command, however this option is the least desirable:
cf delete-buildpack <buildpack-name> -s <stack>3. If you have custom buildpacks that share a name with one of PCF's default buildpacks, this can trick the validation process. You can fix this by re-uploading the custom buildpack with a different name that does not match the name of any default buildpacks in PCF.
Feedback
Yes
No
Powered by
