The Symantec Diagnostic Tool (SymDiag) provides the ability to automatically detect whether a system with a supported Symantec product has a known issue or is in an otherwise problematic condition. Each report that SymDiag runs targets a particular issue or question about the health of a Symantec product. The report will yield a status of Error if an issue is found, Warning if there is a possibility of an issue or Ok if the issue in question is not found. Each report contains one or more tests which answer each question that the report as a whole needs to answer in order to yield a general status. The SymDiag scans that create these reports only gather the data needed to determine the conditions of the tests and as a result the scan can often be completed in under one minute.
Besides the results of the individual tests and their resulting status, the reports contain links to documents in the Symantec knowledge base which provide detailed information on how to resolve an issue or pursue further investigation as to its cause and resolution. The reports themselves will often contain useful information specific to the system that will aid in understanding and correcting the issue.
How to create SymDiag reports
TECH170752
2. Run SymDiag.exe. To ensure complete data collection and reporting, run SymDiag as an administrator.
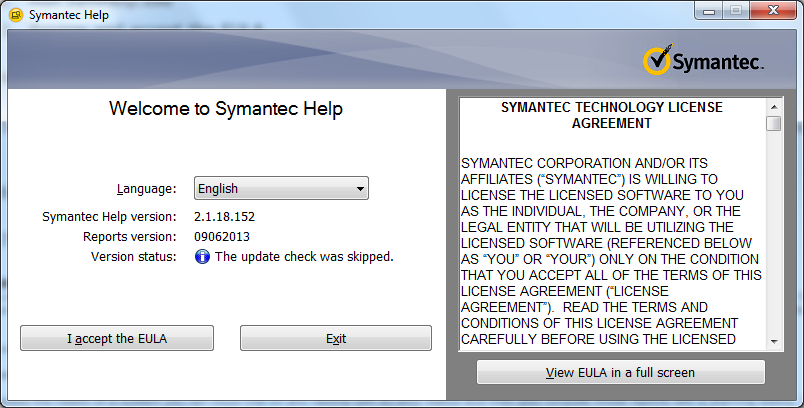
3. Review and accept the EULA
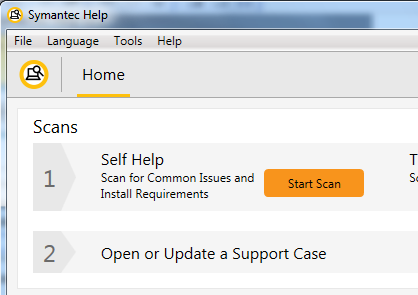
4. Click the ‘Start Scan' button for Self-Help in row 1 of the Scans section on the Home page
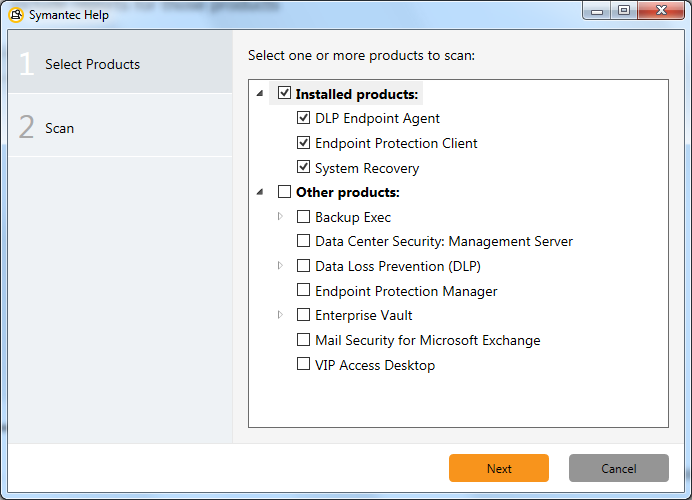
5. Deselect installed Symantec products in the product selection dialog if you do not want the scan to include reports for those products
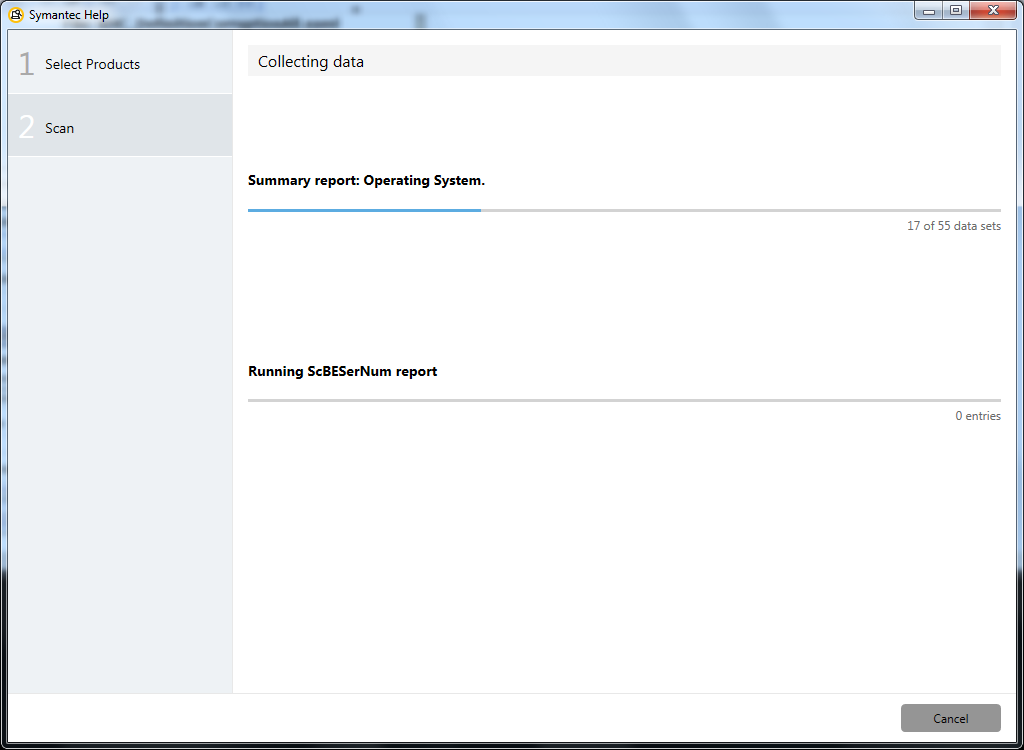
6. While data is collected and the reports are generated, a progress indicator will appear
7. Once the scan is complete the Report page will be displayed
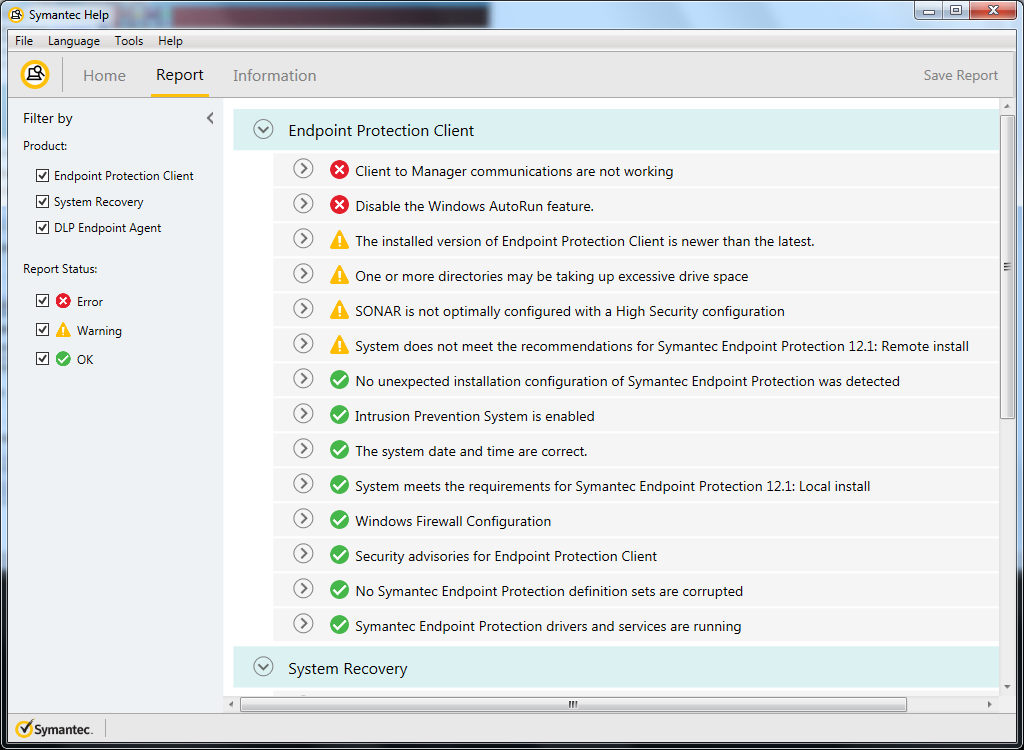
How to view the reports
The report page allows you to select which reports appear by product or by status. The reports are grouped by product and sorted by status such that reports within a product in an Error status will be listed first, followed by Warning, Missing Data and then Ok. Reports can be filtered through checkboxes by product and status as well.
To assess the health of a system you can focus first on any reports with an Error status and then also consider those reports with a Warning status. To later verify that an issue has been resolved, look for that same report to be in the Ok status. Reports that could not complete because there was a problem in collecting the data needed will have a status of Missing Data. If a report has the Missing Data status it may indirectly indicate the nature of the issue as the data that was not collected was expected to be present or accessible on the system.
Examine a report by expanding it using the expander located to the left of the status icon and title of the report. In most cases the title of the report changes to reflect the status giving you a general understanding of what the report has determined.
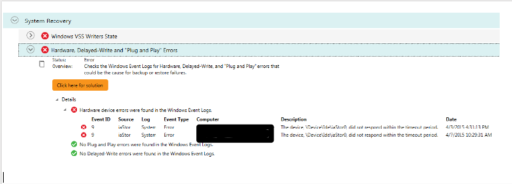
Expanding a report provides a view of the following:
· Status – The status is simply the name of the status
· Overview – This is a brief description of what type of issue or question the report is investigating.
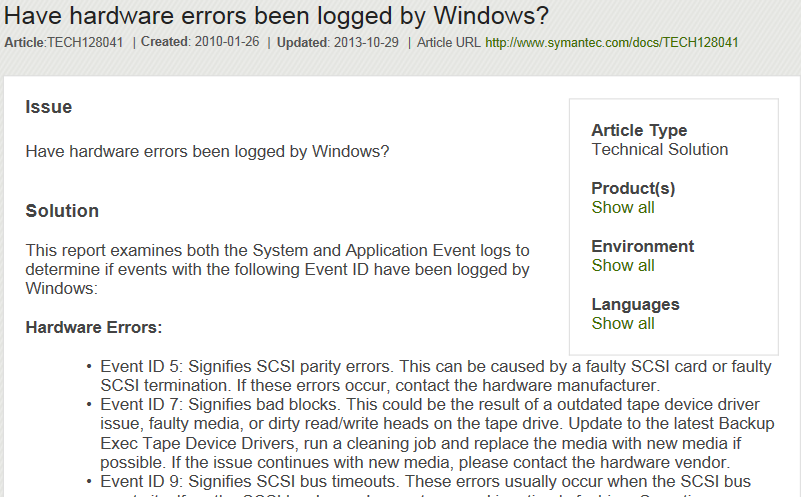
· ‘Click here for solution’ button – The button ‘Click here for solution’ provides a link to one or more Symantec knowledge base documents directly relevant to the report.
· Details - A details section contains the one or more tests that ran to determine the status of the report. Each test may be expanded to yield further information relevant to determining the results of the test. Some tests may contain sub-tests. The test-report status logic is designed in such a way that the most severe test or sub-test result will yield the result for the report as a whole. Some tests may only yield a Warning status at most. A test may yield a neutral Information status if the information it contains by itself cannot determine if there is an Error or Warning status or not, but the information it contains is vital to determining whether other tests will yield an Error or Warning status.
Once you have reviewed a report, if a course of action is not yet apparent then click on the button ‘Click here for a solution’ and review the document or documents that it links to for further information.
What if the reports do not indicate a solution to the issue?
If your technical issue is not one of the common ones that SymDiag can automatically diagnose, go to SymDiag's Home page for links (buttons in a column on the right-hand side of the page) to online support resources and for links to how to contact Symantec for further assistance. If you feel you will need to work with a Symantec support technician consider go to row two under the Scans section of the Home page of SymDiag and open a support case by clicking on the 'Collect Data for Support' button. Doing this and saving the results of the scan will allow you to more quickly engage support and come to a resolution of the technical issue.
You can also contact Symantec Support by opening a new Support case with data collected by SymDiag:
Create or update support cases with data collected by SymDiag
